Cool Playgrounds
Learning Goal
Students learn how to keep people safe and reduce the health impacts of heat waves.
Learning Objective
Students will explore how surfaces heat up more when they are in the sunshine and when they are dark in color and then apply what they’ve learned to design a shade structure to keep a playground cool.
Materials
- Two large tiles: one white and one black
-
- (page 1 for the first part and either page 2 or 3 for the second part)
- Cool Playgrounds slide deck
- For each student pair or group:
- Pencil
- Clipboard
- IR thermometer
- Flashlight
- Action figure or Lego figure (optional)
- Scissors
- Materials for each group to build model shade structures and playgrounds: assorted building materials such as string, paper clips, cardboard, tape, newspaper, wooden dowels, toothpicks, tongue depressors, small sticks, cotton balls, shells, pipe cleaners, aluminum foil, paper, fabric, stones, K’nex, LEGO or other building bricks, markers, Play-Doh, wire
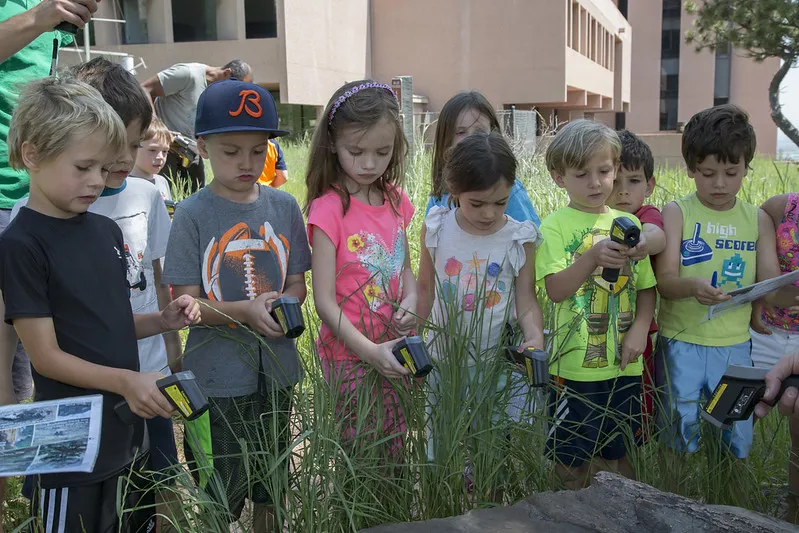
Students use IR thermometers to measure the temperature of areas outside during a temperature scavenger hunt, as in Part 1 of this activity.
UCAR
Preparation
- Identify an area of your school grounds with a variety of surfaces and sunshine and shade where students will measure the temperature during Part 1. This might be in and around the playground. Or it may need to be a larger area so that students have access to all the places they’ll need to find on their scavenger hunt.
- Check the weather forecast to make sure you will be doing Part 1 of this activity during a warm, sunny day.
- Place the black and white tiles outdoors in a sunny location at least two hours before students will be measuring the temperature.
- Orient yourself to the IR thermometer and prepare to introduce it to students.
- Read through the lesson plan and consider whether any of the Adaptations for Younger and Older Students (below) would be appropriate for your class.
- Print copies of the student activity pages for each pair or group of students. (Note that either student page 2 or 3 is needed, not both.)
- Before Part 2, set out the building materials that students will use to build their models on a table.
Directions
Introduction
- Have students describe their experiences playing at a playground (or just outdoors) when the weather is very hot (Slide 3).
- Ask: What are the hottest months of the year? Student answers will vary depending on your regional climate (Slide 4).
- Explain that the weather gets hotter than normal for a few days during a heat wave (Slide 5).
- Tell students that, as the climate warms, heat waves happen more often. Walk students through the infographic (Slide 6) to explain why climate is warming.
- Tell students that, as the climate warms, heat waves happen more often. But there are things that we can do to stay safe during a heat wave (Slide 7).
- Instruct students to watch for ways that people can stay safe in the heat mentioned in the Hazardous Heat Waves video from SkySci for Kids and then play the video (Slide 8; 40 seconds long).
- Focus on heat wave safety: Ask students how the characters in the video stayed safe in a heat wave and then review key ways to stay safe (Slide 9).
- Describe that, in this activity, the class will figure out what types of places outdoors are likely to stay cooler and then apply what they learned to design shade structures for playgrounds where kids can stay cool in the heat.
Part 1: The Temperature Scavenger Hunt
- Assign students into pairs or groups and provide each pair/group with a copy of student page 1, a clipboard, and a pencil.
- Introduce the investigation:
- Not all places outside have the same temperature. Today we will compare the temperature in shady places with the temperature in sunny places for different types of surfaces.
- Your mission is to find at least one example of each item in the scavenger hunt (the items on student activity page 1) and measure its temperature.
- Introduce the IR thermometer and how it can be used to measure temperature. (Note that most IR thermometers have a laser pointer to indicate where the temperature is taken. Make sure students understand that they should never point it at anyone’s eyes.)
- Head outdoors and introduce students to the area where they will measure temperatures. Demonstrate how to use the IR thermometer and where to record the temperature on the student activity page.
- Allow students enough time to find all the items on the scavenger hunt.
- Head back into the classroom to summarize what students have found.
- Create a t-chart on the board with coolest and warmest as the column headings. Ask students to report where they found the coolest and warmest temperatures and record the locations in the chart.
- Write a fill-in-the-blank sentence on the board: Places in the shade are ____ than places that are sunny. (Students should have found that, in general, shady places are cooler than sunny places.)
- Ask the following questions to help students understand the results of their scavenger hunt:
- Are places in the shade always cooler than places in the sunshine? (Students should find that the shade is cooler, but they might also have noticed that not all areas in the shade are the same temperature because different types of surfaces hold onto heat differently.)
- Which types of surfaces stay the coolest? (Answers may vary depending on what surfaces are available for students to measure, but students will likely find that grass and mulch are cooler than asphalt and concrete. They might also notice that the temperature of these surfaces is different in the Sun and the shade.)
- Which tile was cooler? (Students should have found that the light tile was cooler than the dark tile.) Explain that dark colors absorb sunshine better than light colors, so they heat up more.
Part 2: Design a Cool Playground
- Introduce the engineering design project:
- Tell students that they will now apply what they learned to help keep kids cool at a playground.
- Remind students of the three things their playground will need to be safe when it’s hot: shade, a place to rest, and water.
- Note that shade is safer during hot weather both because it’s cooler and because less sunlight can get to your skin and cause a sunburn.
- Review the types of surfaces that stay cooler.
- Explain that students will plan their shade structure with a drawing and then create a model out of what they find on the materials table. Explain that this model is a small version of the real structure.
- In pairs or small groups, have students sketch what they want their shade structure to look like and where they would add a place for rest and water. (For version 2 of the activity, students should also sketch a playground.)
- See Adaptations for Younger and Older Students below.
- Students should visit the materials table as they make a plan for what they will need to build a model of the shade structure and/or playground.
- Review student designs as a class or have each pair/group present their design to one other group.
- With feedback from others in the class, each group will then consider how to revise their designs.
- Have students collect what they will need to build their models at the materials center.
- Allow time for students to build their models.
- Have students test whether their shade structure works (i.e., whether it creates shade). To test this, students should hold the flashlight above their shaded playground and shine the light downward. Demonstrate this process for students. If it creates shade, then the playground will stay cooler. (You may need to turn the classroom lights off or close window blinds to create a dark environment, allowing students to see the shadows below it or light getting through.)
- If time allows, have students make improvements to their shade structure after testing with the flashlight and then test again.
- Have each group share their model with the class during a gallery walk.
- End with a class discussion to review what students have learned:
- What works well for shading playgrounds? (Students should share from their own experience about what materials and designs worked well.)
- Why is shade helpful during hot weather? (It’s cooler in the shade.)
- Besides playing in the shade, what else can you do during a heat wave to stay safe? (As students learned in the video and slides: rest more than usual and drink lots of water.)
Adaptations for Younger and Older Students
With younger students, you may choose to keep the area that they are exploring in Part 1 smaller and label locations where students should measure the temperature instead of having students find the types of locations on their own. And in Part 2, you may have them design only the shade structure, place to rest, and water fountain for an existing playground using the first version of the student activity page.
With more advanced students, you may wish to expand the climate science learning in this activity. Consider having students explore Climate Change on SkySci for Kids or reading the Elementary GLOBE book, What in the World Is Happening to Our Climate?
If you have more time for Part 2 of this activity, and have more advanced students, consider having students design the playground as well as the shade structure in Part 2. Use version 2 of the student activity page without the playground silhouette if you are having students design the playground too. You can also get more advanced students thinking about the scale of their model by having them design their structure and playground as if it’s for action figures or LEGO people. Provide each student group with one or more action figures or LEGO people and explain to students that the figure represents the size of a child. When they build their model, they can decide what size their structure needs to be based on the size of the figure.
Extensions
- Have students assess whether the playground at their school is a safe place to play during hot weather. Does it have shade, a place to rest, and water? Have students use the IR thermometers to take the temperature of different surfaces in the playground during a sunny, warm day. If the class finds that the playground gets very hot because of surfaces that absorb heat and lack of shade, consider having students make a presentation to share their findings with the principal or facilities manager.
- If you are in a region with distinct seasons, have students use the IR thermometers at different times of year to explore how temperature changes with the seasons.
- The Feeling the Heat Activity, for middle and high school students, builds on the concepts learned in the Cool Playgrounds activity.
Background
About Heat Waves
When unusually hot summer weather lasts for several days, it’s known as a heat wave. Heat waves are a danger to human health – causing heat stroke, heat exhaustion, cramps, and other ailments. According to the Intergovernmental Panel on Climate Change (IPCC), heat waves are becoming more common. The increase in the number and duration of heat waves in urban areas is due to a combination of climate warming and the urban heat island effect, which occurs where buildings and pavement absorb energy from the Sun.
About IR Thermometers
Infrared thermometers (also called IR thermometers or IR guns) are used in Part 1 of this activity. While precise IR thermometers can cost over a hundred dollars, students will only need the most basic type for this activity, which cost about $10-$15. IR thermometers measure temperature by assessing the amount of energy emitted from an object. When sunlight hits Earth's surface, some of that energy is absorbed and some is reflected. The energy that is absorbed is then radiated as heat from the surface.
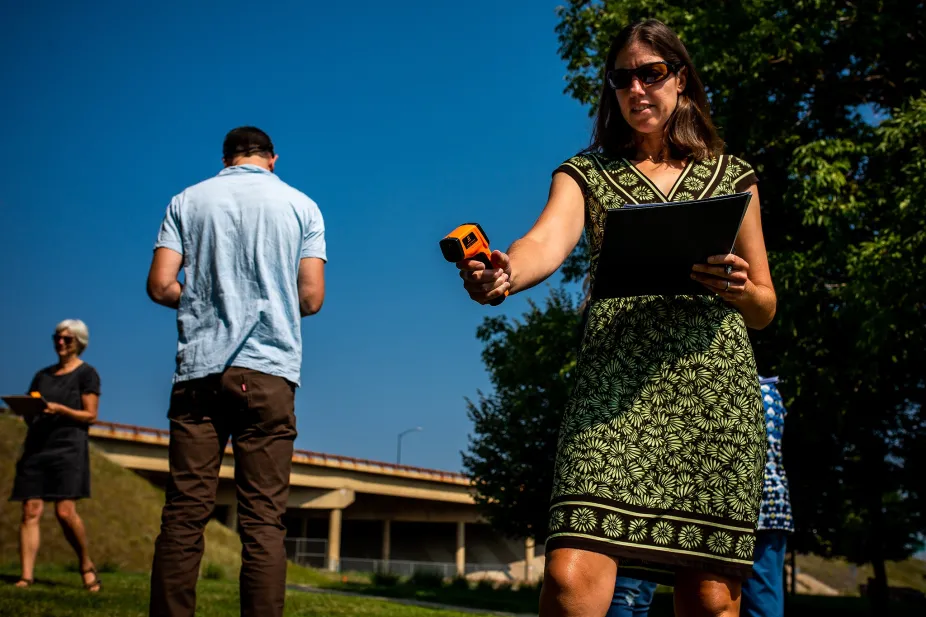
Teachers use IR thermometers to measure the temperature of surfaces outdoors in the sunshine.
UCAR
Why Temperature Varies in the Schoolyard
In Part 1 of this activity, students investigate differences in temperature in their schoolyard on a warm, sunny day. Temperature changes day to day with the weather and throughout the year with the seasons, but on any given day, especially a sunny day, temperature can vary throughout the schoolyard. The temperature will be different in different areas of the schoolyard because of factors like the presence or absence of shade (from trees, buildings) and the type of material at the ground surface (dirt, grass, asphalt, concrete). Shaded areas are generally cooler since minimal solar radiation is able to be absorbed by Earth's surface. Ground materials like asphalt and concrete absorb solar energy readily. Dark paving will typically be warmer than lighter paving because dark colors absorb more heat.
Adaptation to Heat
The climate will continue to warm until we reduce greenhouse gasses, but we can help keep people as safe as possible by taking steps to adapt. This can mean adding shade structures to playgrounds (the example in this activity), and it can also include many other types of actions that communities can take, including planting trees for shade, transforming paved areas into gardens, designating cooling centers where people can go to be in air conditioning (such as recreation and community centers), painting roofs and pavement white, and developing early warning systems so that people are aware of the risk.