Modeling the Behavior of Air with Bottles
In this activity, students use a model to understand how temperature affects the behavior of air molecules.
Learning Objectives
Part 1: Hands-on activity
- Students will be able to explain how temperature affects the behavior of air, including how the volume of air changes with temperature
- Students will create a model to show how air expands or contracts depending on temperature increases or decreases
Part 2 (Optional): Kinesthetic activity
- Students will be able to communicate how warm and cool temperatures affect the behavior of air
Part 3 (Optional): Hands-on challenge
- Students will understand how to incorporate their understanding of how temperature affects the behavior of air molecules to design an engineering solution to a challenge.
Materials
You will need enough sets of each of the following materials for students to work in pairs or small groups:
- 2 clear 1-liter bottles
- Clear plastic box (shoebox or similar)
- Small plastic containers
- Liquid dishwashing soap (diluted)
- Ice water
- Warm water (you can use an electric kettle, microwave, or hot water dispenser)
- Students' science journals
Preparation
- Set up enough work stations for students to work in pairs or small groups.
- For each small group:
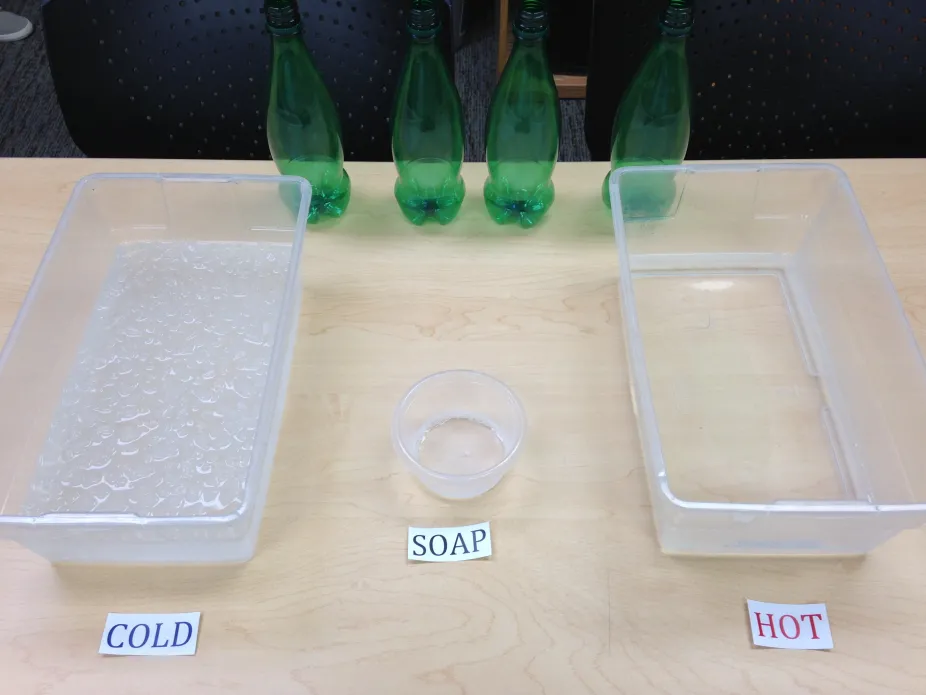
- Fill the small plastic container with the diluted soap.
- Fill one of the clear plastic shoe boxes with the 3"-5" of ice water
- Fill the other clear plastic shoe box with 3"-5" of warm water. Be sure to review common safety precautions.
- Place one bottle for every student in the group.
Directions
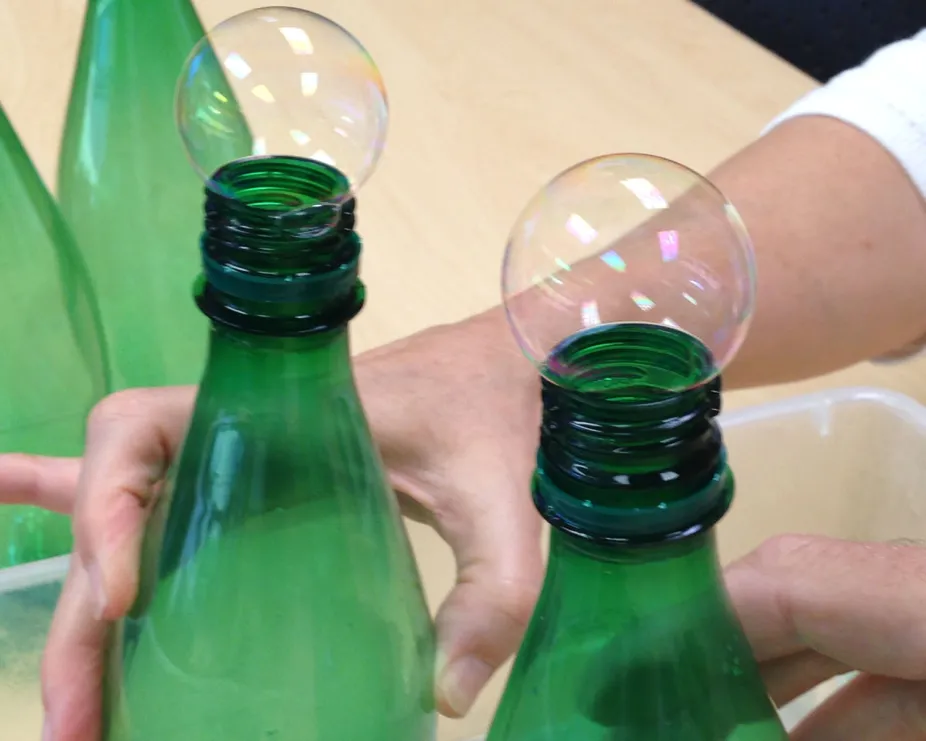
- Demonstrate to the students how to dip the narrow open end of the bottle (mouth) into the soap container to form a film. Have the students practice. Remind students that if the film pops, they can simply repeat the procedure.
- Show students how to place the bottle in the cold water container. Remind them to place the bottom of the bottle in the water with the bottle straight upward. Have students record their observations in their Science Journals by having them sketch the bubble when the bottle is in cold water.
- Guide students to place the bottle in the warm water container. Again remind them to place the bottom of the bottle in the water with the bottle straight upward. Have students record their observations in their Science Journals by having them sketch the bubble when the bottle is in warm water.
- Have the students move the bottles back and forth between the warm and cold water. Do they notice how the bubble behaves? When does the bubble rise above the bottle? When does the bubble lower into the bottle?
Note: For more teaching directions, see the Modeling the Behavior of Air with Bottles demonstration video for teachers.
Sense-making
Explain to students that convection is the transfer of heat by the movement or flow of a substance from one position to another. Temperature is a measure of the average speed or kinetic energy of molecules. By observing the bubble, students learned how the temperature of air inside the bottle makes the volume of air grow or shrink.
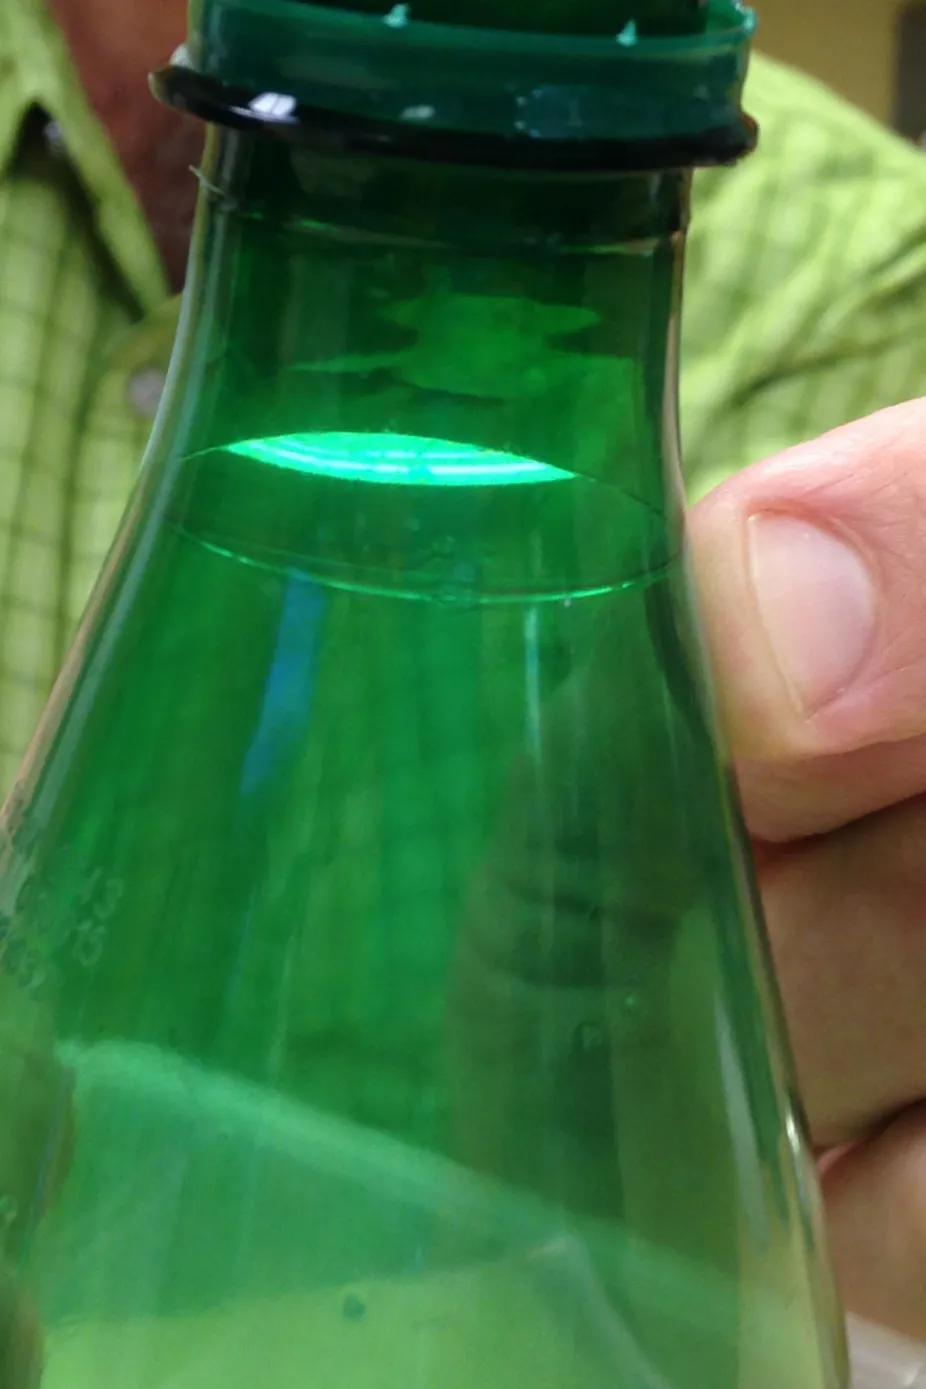
The warm water causes the air inside the bubble to warm and expand, thus increasing the volume of air and pushing the bubble above the mouth of the bottle. The cold water causes the air inside the bottle to cool and shrink, thus decreasing the volume of air and pulling the bubble down into the base of the bottle.
As temperature of air in the bottle fluctuates between cold and warm, the bubble demonstrates the behavior of air. Students can see how the mass of air in the bottle remains the same, but the volume changes as a result of the temperature.
Discussion of the Model:
After the activity, discuss aspects of the model that are useful in explaining how temperature affects the behavior of air molecules. How is the model good at explaining what happens with air? What are the limitations of this model?
Assessment Questions:
- Is the air rising or sinking when the bottle is warm? Why? (Students should demonstrate understanding that the air rises when the bottle is warmed.)
- Is the air rising or sinking when the bottle is cool? Why? (Students should demonstrate understanding that the air sinks when the bottle is cooled.)
Part 2: Communicating the results through kinesthetic activity
Learning Objectives:
Students will be able to demonstrate how temperature affects the behavior of air molecules, including how warm and cold air move differently.
Supplies Needed:
Student actors
Instructions:
- Begin the activity by telling students to stand up and become a "bottle" just like the one they used in the classroom activity. Tell the students that in this activity, their arms will be the bubble.
- Direct students to act like they are dipping their heads into the soap solution.
- Lead the students to step into the pretend tub of warm water. Tell the students to move their arms like the bubble. (Students should demonstrate a rising, expanding bubble above their heads.)
- Lead the students to step into the pretend tub of cold water. Tell the students to move their arms like the bubble. (Students should demonstrate a lowering, contracting bubble below their waists.)
Assess student learning by asking:
- Did your bubble go all the way down to the bottom of the bottle when you stood in the cold water? Why or why not?
- What happened when you stepped in the warm water?
- Did your bubble pop? Why or why not?
- Why is it helpful to communicate your science experiment with others?
- What are some of the methods scientists use to communicate their research with others?
Part 3: Engineering a solution
Learning Objectives:
Students will incorporate background knowledge about how temperature affects the behavior of air to design an engineering solution to a challenge.
Supplies needed:
- clear glass bottle (per student or small groups)
- one large round-shaped balloon (per student or small group)
- Warm water (can be heated in a large kettle, pan, or coffee urn)
- Plastic box (shoebox size)
Preparation:
At each small group table, place one plastic bottle, a balloon, and one plastic box filled with warm water. (You can place more supplies per group if you have access to additional supplies.)
Instructions:
- Begin the activity by asking the students to recall the behavior of the bubble when the bottle was cooled and heated.
- Tell the students that using the background knowledge they have about how temperature affects the behavior of air, you have a challenge for the class.
- Tell the students that each small group has a challenge to solve: figure out a way to blow up the balloon without touching the balloon. (You may choose to allow students a few minutes to discuss in the group before beginning the hands-on part.)
- Allow students about 8-10 minutes to explore various design solutions. Students should demonstrate understanding that similarly to the bubble rising in the warm water, placing the balloon on the bottle and putting the bottle in the warm water should cause the balloon to rise.
Sense-making
- Discuss hot air balloons with the students. What causes hot air balloons to rise?
- Ask students if they can think of other things that would cause the balloon to rise. Engage in a discussion about each of the ingredients that relates each item back to a STEM field.
- For example:
- If a student says, "baking soda and vinegar," they are thinking like a chemist.
- If a student says, "cutting a hole in the bottle with glass cutters," they are thinking like an engineer.
- If a student says, "place the bottle in another heat source," they are thinking like a physicist or a meteorologist (someone who studies how air moves).