The Disappearing Pond
Students learn how making changes to our environment can help keep people safe and reduce the impacts of weather hazards as they explore a human-built pond that is sometimes dry and sometimes filled with floodwater.
Learning Goal
Students learn how making changes to our environment can help keep people safe and reduce the impacts of weather hazards.
Learning Objective
Students will be able to describe how a human-built pond can help prevent flooding during large rainstorms.
Materials
- Whiteboard or chart paper
- Scissors
- Glue sticks
- Slide deck: The Disappearing Pond
- Large piece of white craft paper (butcher paper) or a piece of letter-sized paper for each group of 3-4 students
- Spray bottle filled with water and a drop of blue food coloring
- Markers
- One clear plastic shoebox for each group of 3-4 students
- Fine-grained sand or soil (at least enough to fill the shoeboxes halfway)
- Watering can with a sprinkle nozzle (to simulate rain)
Preparation
- Read through the lesson plan and consider whether any of the Adaptations for Younger and Older Students (below) would be appropriate for your class.
- Print copies of the student pages for each pair of students. Omit the third page if you wish to have students write the story instead of matching story parts.
Directions
Introduction
- Have students describe what they know about ponds. If there is a nearby pond, invite students to share what they remember about that pond.
- Show a picture of Little Town Pond full of water (Slide 3). Explain that, like all ponds, this one is a small body of water surrounded by land. But unlike most ponds, this one was made by the people of Little Town.
- Show the picture of Little Town Pond being made (Slide 4) and explain that they dug into the ground to make a low area where water could collect. It’s a human-built pond.
- Ask: Why do you think the town made this pond? (Slide 5)
- Record student answers on the board or on chart paper and explain that, in this lesson, students will learn how this pond helps the people of the town.
- Show a picture of Little Town Pond with no water in it (Slide 6). Tell students that Little Town Pond is often dry.
- Ask: Why do you think there is only water in the pond sometimes? (Slide 7)
- List student ideas on the board or on chart paper and explain that during this lesson we will learn more about water and ponds to help us understand why Little Town Pond is often dry.
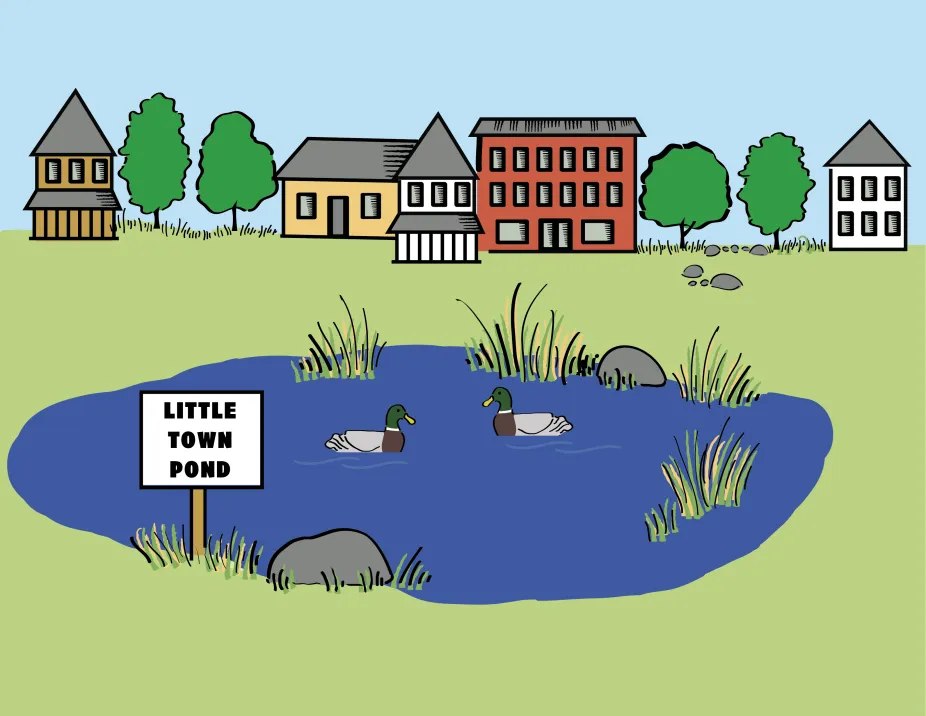
Little Town Pond collects stormwater, which students learn about in the Disappearing Pond activity.
UCAR
Part 1: When It Rains
- Give each student or student pair a copy of the student pages. Explain that the pictures tell a story that helps us understand why the people of Little Town made the pond.
- Provide scissors and a glue stick to each student or pair if students will be matching the story parts. Instruct students to cut apart the five story parts (on the third page), match them with the picture that tells that part of the story, and glue each in place.
- Review the story together as a class showing Slides 9-13 as you review and have students tell each part of the story.
- Ask students how the dry pond becomes filled with water. (Students should mention that water from the storm flows into the pond.)
- Remind students of their ideas about why there was no water in the pond, and discuss how they’d answer now, given what we now know happened to the pond when it rained. (Students should recognize that the pond may be dry if there hasn’t been a storm. They may recognize that their ideas shifted with more information.)
Part 2: Where Water Flows
- Show Slide 15 to remind students of how the water flowed down the road and into the pond. Tell students that they are going to create a model to learn more about where water goes when it rains.
- Head outside with a large piece of craft paper, a spray bottle, and a marker. Or plan for model-making indoors in a large tray or on a surface that can get wet.
- Have students crumple up a large piece of craft paper (butcher paper) and then open it up without flattening it entirely.
- Explain that, in this model, the paper represents the land surface. Crumpling the paper gave the land some shape (topography).
- Have students find the highest points. Those are the hills or mountains in this model.
- Have students find the lowest points. Those are the valleys, where lakes, ponds, and rivers are likely to form.
- Explain that the class is going to make a rainstorm over this model with the spray bottle filled with water and see where the water flows and where it forms ponds and lakes.
- Mark on the paper places where students think ponds and lakes are likely to form.
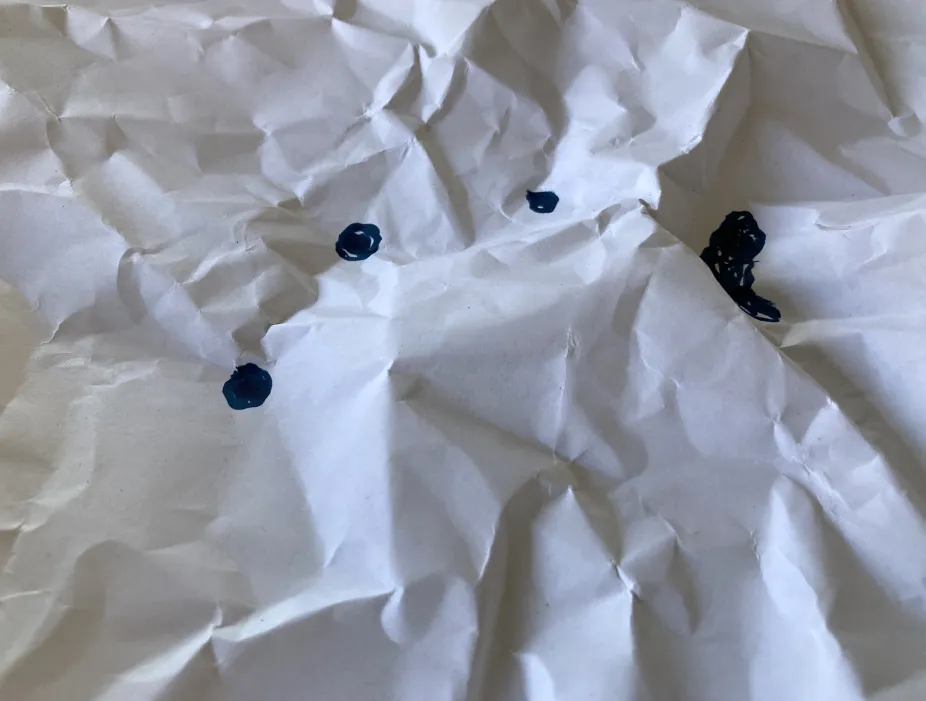
In the Disappearing Pond activity, students create a model of a landscape's topography with a crumpled piece of paper and then simulate a rainstorm with a watering can to see how water flows into the lowest areas.
UCAR
- Make a rainstorm over the highest points in the model landscape using the spray bottle filled with water and blue food coloring. (For best results, use a gentle spray instead of a strong jet.)
- Ask students what they notice about how the water moves through the model landscape. (They should notice that water flows downhill. They may be able to identify that the water forms rivers as it flows.)
- Head back inside for a discussion that helps students make connections between the model and the pond in Little Town. Remind students of what happened in the town when there was a big rainstorm, showing Slide 15, and ask:
- Where did the water flow? (It filled the street and flowed into the pond. Students may deduce that the pond is downhill from the buildings in town.)
- If the town hadn’t dug a pond, where might the water end up? (Students should look at the images to identify what the water could have flowed into, including houses and apartments.)
- Tell students that water flowing where it’s not supposed to flow is called a flood.
- Ask: “How does the pond help the town prevent damage from floods?” (The town made the pond to prevent rain water from flooding people’s houses.)
- Revisit student ideas about why the town made the pond, and discuss how students would answer now, given what happened during the storm.
- Explain that big rainstorms are natural, but in some places there are now big rainstorms happening more often. Building the pond is one way that people can adapt to live with more big rainstorms.
Part 3: Disappearing Water
- Tell students that, on the day after the storm ended, the pond was full of water (Slide 17). A week later, about half the water was gone (Slide 18). And a month later, there was no water in the pond (Slide 19). No one saw water flowing out of the pond and no one took the water out of the pond.
- Ask: Where did the water go?
- If students already know about the water cycle, they may wonder if the water evaporated into the air. Some of it probably did, but not all of it.
- If students don’t suggest it, explain that most of the water sunk underground.
- Tell students that they are going to make a model of the Little Town pond to figure out how water gets underground. Provide each group of 3-4 students with a plastic shoebox that is at least half full of sand.
- Explain the parts of the model:
- The sand is the land. Have students pat down the sand and shape the land surface as they wish.
- The pond will need to be in the lowest area so water collects in it. Have students make a low area by pushing down on the sand in one spot or scooping some sand away to make a low spot for the pond to form. Remind students that Little Town Pond was not very deep. (Student ponds should not reach the bottom of the box or the water will have nowhere to go.)
- Show students the watering can and tell them that it will be used to model a rainstorm in their town.
- Visit each student group with the watering can and create a rainstorm on the landscape until the pond is full while students watch. Students should see the water fill their pond before sinking down below it within about a minute. It may take somewhat more or less time depending on the type of sediment and how moist it was to start.
- Have students draw a picture of their model to explain what happened to the water.
Conclusion and Assessment
- Ask students: How does the pond help the people of Little Town cope with large rainstorms?
- Have students write or draw their answers, describing why the people of Little Town built a pond and how it helps them,
- Students then share their answers in small groups or as a class.
- Help students relate this example to the idea of planning that helps keep people safe from climate impacts.
- Explain that storms with heavy rainfall are becoming more common in many areas as climate changes, which is why the pond was made to keep people who live in Little Town safe.
- Ask students if they can think of any other actions that help keep people in their community safe from heat waves, storms, or other hazards. (Answers may depend somewhat on your geography, the types of hazards that are common there, and students’ prior knowledge. You may wish to omit this part of the conclusion with younger students.)
Adaptations for Younger and Older Students
- Part 1: For more advanced students, you may wish to have them write into the space below each illustration to create the story themselves instead of matching the story parts. (Omit the third student page if you’ll have students write the story themselves.) If printing student pages is not possible, or if your students are not yet reading and writing, you may wish to instead project the illustrations for the class and either tell them the story or ask students to describe what they see happening in the pictures.
- Part 2: This activity can be done with more advanced students in a less-guided format by having student pairs make their own models using a letter-sized sheet of paper. During the class discussion, at the end of Part 2, be conscious of students' emotional wellbeing, particularly if your community has experienced flooding. If students reflect on their own experiences with floods, ask what they saw people do to stay safe and assist others to help the class focus on resilience.
- Part 3: You may wish to do this activity in a sandbox on the playground, either with the class creating one pond together (adding features of Little Town if they want to make the model look like the place), or with student groups each creating their own pond in different spots.
Extensions
- The next time it rains, have the class survey where water forms puddles near the school. Have students think about why the water isn’t flowing away or sinking into the ground. (Often puddles are in places where water can’t sink into the ground, like on asphalt and concrete. And if the surface is flat, the water stays put.)
- If your city or town has planned areas for floodwater, help students connect the ideas learned in this activity with their local environment by either taking a field trip or showing students photos of the nearby human-built retention ponds and other features to handle stormwater.
- Turn the model that students make in Part 3 of this lesson into an experiment and have students compare factors that influence how quickly the water will absorb or how much water will absorb – using different sediments and different moisture levels within the sediments.
- Rain is common in some regional climates and uncommon in others. Help students expand their understanding of regional climates with the Climate Postcards activity (NGSS PE 3-ESS2-2).
- Follow this activity by having students investigate other places where water is found on Earth (NGSS PE 2-ESS2-3).
- Heavy rainfall events are becoming more common because more water evaporates in a warmer climate. Help students learn how this works by combining this activity with instruction on the water cycle.
Background
This activity uses a resilience strategy as a phenomenon for elementary students to explore: a detention pond where rainwater can collect. These human-built ponds help prevent buildings from flooding. This lesson is designed to help students understand that there are actions that we can all take to help us stay safe from hazards in the environment. Hopefully, students will build on this understanding in middle and high school as they learn how climate change is making actions to mitigate hazards like flooding increasingly necessary.
Extreme rainfall and climate change
As global climate warms, more water evaporates into the atmosphere, storm clouds contain more moisture, and storms can produce more rain. The term “extreme rainfall event” is often used to describe a storm that has an unusually large amount of rainfall. For example, the amount of rain that would usually fall in the area over a month may occur in a single extreme rainfall event.
Because of climate change, some areas will experience heavier and more frequent precipitation, while other areas become more prone to drought. Climate models are used to predict whether a region is likely to experience more or less precipitation in future years. In the United States, storms with heavy rainfall have been increasing over the last three to five decades, according to the U.S. National Climate Assessment, with the most dramatic increases happening in the Midwest and Northeast.
Flood mitigation
When rain falls faster than the water can be absorbed by the land, the water fills or overflows rivers, creeks, and ponds, causing floods. Some types of land are able to absorb more water than others. For example, if the land is solid granite, no water can permeate it. If the land is made of soil, sediment, or sedimentary rock, some water can be absorbed.
Climate change is increasing the number of extreme rainfall events in many areas and, increasingly, cities and towns are filled with surfaces like concrete that are unable to absorb water. With more impervious surfaces and more rain water, the chances of communities flooding are growing. But communities are able to adapt to this aspect of climate change with strategies to help mitigate flooding, which means that the impacts of flooding are less severe, which means that cities and towns are less vulnerable to heavy rainfall.
There are many different types of flood mitigation strategies. Most are features built into a landscape to help prevent destruction from floodwaters, like Little Town Pond. Similar to detention ponds, bioswales are channels covered with vegetation that collect rainwater from impervious surfaces like parking lots and allow it to flow away from vulnerable places like homes and other buildings. Rain gardens are another way that communities manage rainwater. The garden, located in a low-lying area, is designed to collect rainwater and filter out pollutants while also being a home to plants. And retention ponds remain filled with water most or all of the time, which the community can use.