View from a Drone: Make a 3D Model from Your Photos
Goal
Drones can take photos that you can analyze later. By planning ahead to have enough overlap between photos, you take those individual photos and make a 3-dimensional image!
When walking on a hike or around the schoolyard, sometimes you see something that is high up on a rock outcrop or on a hill that catches your interest. For instance, a previous forest fire might have left a hillside bare of vegetation to hold the soil in place. How is the hillside starting to shift after rainstorms or snows? Monitoring an area over many months can lead to discoveries about how the erosional processes happen and also provide homeowners, park rangers, planners, and others valuable information to take action to stabilize areas to prevent landslides.
Materials

- Drone with a camera or a long pole to attach a camera
- Extra batteries for the drone
- One-meter circle or square laid on the ground (cloth or tarp) and long tape measure
- Software that will make a 3D image from photos:
Directions
The Challenge: Students will design and conduct an experiment to take enough photos to make a 3-dimensional image of an outcrop or landform.
Taking photos from multiple viewpoints can yield better 3d models, so using a drone with a camera onboard, from the ground, a balloon and/or from a tall pole might be useful for the study.
Example - Post-fire hillsides: An investigation to monitor a hillside or road cut for pre-landslide movements such as slumping after a wildfire has removed all of the vegetation.
Have students make a plan
- To develop their plan, students need to know the size of the area they want to photograph and field of view of the camera(s).
- Have students discuss who is needed for the team. Who will be the pilot? The photographer? The spotter? If students use a camera that sends its image to a screen or phone, they should designate a photographer to take the photos.
- Have students discuss hazards that need to be avoided.
Tell students to sketch a map showing planned route for their drone to fly and from which directions. The map should show where the pilot, photographer, and spotters will stand. Ask students to think about the order & from what angles they will take the photos.
Ask students to sketch a drawing of where the photos will be taken. How far from the outcrop will the drone need to fly and get enough detail for their project? How many photos will students need to take to have 70% overlap? Where: how high, from how far away, how many? When during the day, during the year, after an event? Each photo should overlap the previous photo by 60% - 80%. If multiple rows of photos are taken, remind students to overlap the rows by 60% - 80%.
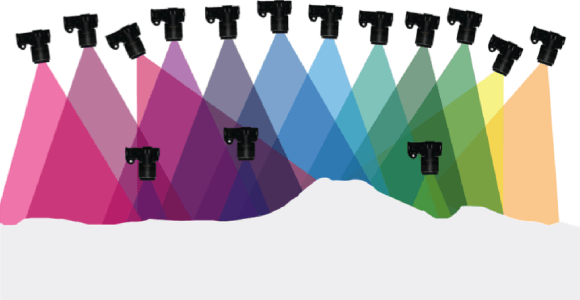
Less effective scans result from only taking photos straight on or in a divergent pattern (as in taking the photos while standing in one spot and turning the camera), such as shown in the image below:

Tell students to think about:
- How the angle of camera on the drone impacts the photos. Are circles still circles in the photograph?
- What environmental or drone-based variables could interfere with their photographs?
- What other information should be in their sketches?
- How they will measure the size of objects and the height of their drone? (Hint: cut a tarp into a circle or square, one-meter across - other methods?)
Discuss safety considerations with students
Is it safe to fly a drone? If the study area is near a road, are all students safely off the road?
Field work: Take the photos and measurements
Have students carry out their investigation and collect data: They should add information about their photos in a table. Have students documents any new questions they thought of while conducting their investigation. Have students record data about each session and flight. Tell them to take measurements to calculate the object and heights.
Have students make a table similar to the one shown below to record their data.
| Flight 1: Location identification numbers for map | Test circle | 1 | 2 | 3 | 4 | 5 |
|---|---|---|---|---|---|---|
| Name of pilot, photographer, spotters | Pilot: Photographer: Spotters: |
|||||
| Range of photo numbers | ||||||
| Date & Time Range | ||||||
| Height above ground, distance from the outcrop & area covered by each photo. Direction of image collection (Panorama, Walk, Spin, Wall) |
||||||
| Description of image* |
* Are there trees, bushes, grasses at the top of the outcrop? How far do the roots go into the rock? How is the rock where there are roots different than other areas? Color, consistency, staining, etc.
After the investigation, students should show locations of their photos.
Have students create the 3d model(s)
Have students use online software to stitch the photos together to make a 3D image. An example of a smart device applications is Trnio (Apple iOS). SketchFab is an online site for showing off their models!
Recap is currently free and allows 50 photos in a model. A single 'row' of photos with lots of overlap (think zig-zag up and down) works well for this application. An alternative is to take the photos with the drone (or other camera) then import them into a 3d model application on a smart device. There are many applications that will create 3D models, such as Agisoft, that are not free.
Ask students to analyze & interpret the model(s)
How do the models contribute to answering the questions students generated at the start of the activity?
Have students measure the objects in their photos. Are circles actually circles? This can provide information about the distortion of the objects in their images and models. Ask students to generate statistics from their data.
Assessment
Have students describe what have they learned from data and the project.
- Tell students to compile flight log, hypothesis, images, data chart, conclusion, and any additional project pictures and results into a short report (or PowerPoint) for a classroom presentation or science fair exhibit.
- Ask students how they would have changed their investigation designs. What modifications, sensors, and/or instruments would have helped with their projects? Suggest that they take a look at the engineering design loop for ideas.
- Tell students to brainstorm additional projects they can do with the camera on their drone. What other 3D projects could they do? How could printing the 3D image help with their analysis, communication, etc.?
Background
The process of taking many overlapping photos to construct a three-dimensional model is often called structure from motion (SfM). This photogrammetric technique has many research applications in geodesy, geomorphology, structural geology, and other subfields of geology. Learn more about this technique in the Geodesy Tools for Societal Issues unit: Introduction to SfM.
Credits
This activity was developed by Shelley Olds, UNAVCO for Earth Science Information Partners (ESIP).

It is offered under a Creative Commons Attribution-NonCommercial-ShareAlike license.